Exercise to Prepare for Rucking

Exercise to Prepare for Rucking

Exercise that Helps You Prepare for Rucking

Whether you’re an athlete, into physical sport or just want to maintain that physical fitness, rucking can be the go to fitness program for you. Although rucking or ruck marches are a required part of military training, but for an ordinary individual they can help build body strength and endurance for obstacle courses.

Like every training program or workout, there is usually a routine and this could involve going on rock marches once every week or once every two weeks. In order to prepare for long rucks and reduce the risk of injury, you need to subconsciously know that it takes more than just packing your backpacks and going on rucks. For you to attain that physical condition or level required to effectively manage a ruck march, you have to train the movement parts of the body and strengthen the supporting muscle to lessen the impact forces on the knees.
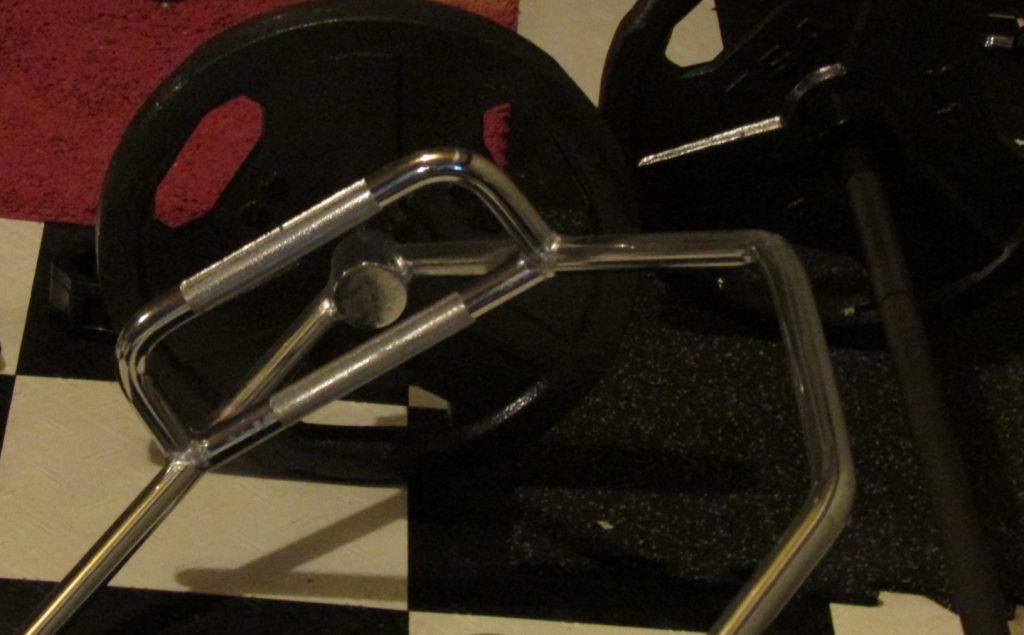
Deadlifts are one exercise to prepare for rucking

Below are a few great exercise that will help you prepare your body for rucking.

Running

Running can be used as a preparatory exercise that helps you condition your body for rucking. This is because running adds 3 times your body weight on you glutes, knees, hamstring and ankles. Thus, helping you build a level of physical tolerance (to your lower body) when you ruck with a weighted backpack.

Back squat and Lunge Complex

This helps to strengthen the back and the rib muscle. It stabilizes the muscle and pattern movement of the upper body.

How To: First perform 2 back squat and then perform 2 lunges. Avoid rushing when switching from a back squat to a lunge. Ensure that you’re balanced before switching.

If you’re new to this exercise, use light loads or body weights only.

Rolling Shrugs

This helps to build endurance for your rucking, especially against fatigue and discomfort. The more comfortable you are, the better you will perform.

How To: grab two dumbbells and shrug, bringing your shoulders to your ears, as you would in a normal shrug. Instead of dropping your shoulders back down, first roll to the back. Drop down in the back position then shrug your shoulders back and up. And drop down in the front position.

The rolling movements helps with shoulder blade or scapular control and has a movement pattern that is similar to adjusting your backpack or rucksack.

Deadlift

This helps to strengthen your glutes, hamstring and back muscles and it’s an exercise that is usually done using a barbell. Use light weights as part of a warm-up before doing the deadlift.

How To: Grab the bar and bend your knees. Lift your chest, straighten your back, butt out and chest up. Take a deep breath, hold it and stand up.

Stay tuned for an upcoming video series demonstrating these techniques.

Prepare for Rucking, Avoid Mistakes

Prepare for Rucking, Avoid Mistakes

Rucking – Preparation and Avoiding Common Mistakes

Note how extensively we have talked about rucking in our previous articles. By now you are surely well acquainted to some of the pros and cons of rucking. Diving further let’s talk about this awesome workout or training program. Let’s look at how we can properly prepare for a ruck march, some common errors and how to avoid them.

Preparation – Important items to have

Whether you are a beginner or experienced at rucking, this is the first thing you should do. Decide when, where and how long you want to ruck for. You can do short rucks  on pedestrian walks (by the road side). You’ll want to do longer rucks out in the wild (forest reserve, mountain and hill tops). Going on rucks involves more than just carrying a weighted backpack from your start point to your finish point and back. You’ll need to know the essential gear or items that are needed in order to have a successful ruck workout.

Some of these essential rucking items include:

Standard Boots: Avoid going on rucks with fancy or substandard boots.  Always ensure that your boot has enough space in it in order to reduce foot and ankle injuries.

Water: Going on a ruck without water is like going a on a road trip without gas. Take as much water as possible for the ruck and ensure that you drink as much as possible to keep yourself hydrated throughout the ruck.

Snacks: Take snacks that are quite easy to consume on the go in order to keep yourself energised.

Electrolyte: Take some electrolyte drinks or tablets along. This is because you are likely to sweat frequently and those lost electrolytes needs to be replace.

Hat/Cap: This is helps to keep rain, sweat and even the sun rays out of your face and eyes.

Clothing: Strive to go on rucks with extra clothes and clean pairs of socks because you may decide to change your clothes as a result of sweating.

Torchlight: If you’re rucking at night, having that extra eye (a torchlight) might just come in handy.

Cell phone: This can be very handy when you’re out rucking alone. This is because you may hurt yourself and will need to call 911 (for help) if there’s an emergency.

Rucking Errors to Avoid

If you’re an amateur or just about to ruck for the first time, here are some mistakes you should never make;

  • Maintaining a proper diet is highly essential before going on rucks. This is because the human body is a fuel burning machine and it needs food to function efficiently.
  • Always avoid carrying a too heavy weighted backpack. Know what the perfect fit is for you and do not exceed your limit. You will be tempted because you want get a faster result and prove a point that you’re stronger than you look.
  • While rucking, avoid walking too fast or running in order to avoid impact injury.


5 Benefits of Rucking You Need to Know

5 Benefits of Rucking You Need to Know

Rucking can be enjoyed by nearly anyone capable of walking or going on a long stroll. Rucking takes its origin from before the medieval times. Soldiers (like the Greeks or Romans) would march for hours, days or even months while journeying to their destination. Modern rucking developed as soldiers packed up supplies and equipment in a rucksack (backpack) and then marched with it. Many people still call it “ruck marching” today.

Rucking today has evolved to being not just an exercise carried out by soldiers, rescue worker and firefighters. You will find that ordinary civilians, athletes and average individuals who are looking to keep their body healthy also enjoy rucking. Folks who ruck can do it with a minimum of equipment. Typically with a backpack or rucksack that weighs between 10% to 30% of their bodyweight or even more. This is depending on each individuals capabilities, naturally. Of course there are a lot of rucking start up programs popping up seemingly every day. These can help the participant push themselves beyond their physical and mental limits. Though anyone can ruck on their own with a minimum of guidance.

Here are five significant health benefits of rucking;

  1. Creates A New Experience

For quite a few people who work out much time is spent in the gym or behind closed doors. This is often the only cardio they do. Rucking will give you the first class treat of experiencing nature in a whole different way. Exercising outdoors wards off depression and reduces stress in an individual, according to research that has been done.

  1. Cardiovascular Exercise

Rucking is a great way to increase your heart rate and blood flow. Achieve that goal without running or engaging in other high impact or somewhat dangerous workouts. Rucking definitely helps your body to maintain a healthy heart rate and blood flow. The additional burden of a weighted backpack increases the resistance. This is especially noticeable on an inclined path.

  1. Improves the Body’s Physique

Do you hate jogging, running or even hitting the gym? Do you still want to ignite those calories? Rucking might just be the answer you need to maintain a healthy body weight. Studies illustrate that you can burn calories up to 40-50% more effectively while rucking or walking carrying added weight. Compare that to the 65-75% more effective calorie burn while jogging. Let’s just say that rucking seems like a better idea. Less impact while also exploring the great outdoors facilitating an avenue for you to embrace your imaginative powers.

Can you see the benefits of rucking in your own training?

  1. Less Impact on the Body

Compared to running or jogging, rucking has lesser negative impact on your body as a whole. One reason why a lot of individuals detest jogging is because of pressure on your lower body. This often results in pains and discomfort in your knees, hamstrings and ankles. Running over any distance or even on a treadmill can cause injury. Rucking creates greatly less stress on your body and you are definitely yielding a similar result at the same time. It’s a win-win situation.

  1. Improves Your Body Endurance and Strength

This is one thing typically people don’t understand. Having the added load or weight on your back helps builds your lower body strength. This is because rucking over a long distance helps your body to develop improved body balance (agility). Thus likewise improving your all round work ability and physical endurance level.

Rucking outdoors, for many of us, is just not something we can do every day. For you I’ve written my Rucking Simple Treadmill Training Guide – available on Amazon. Check it out now and learn everything you need to know and do to get results quickly. 

BMR Calculator With Instructions

BMR Calculator With Instructions

BMR or Basal Metabolic Rate is an estimate of your caloric needs.

It’s based on fairly standard scientific math, and is a decent estimate of your base calorie expenditure. The most basic calculation determines how many calories your body would burn laying down, just pumping blood and oxygen around your still quiet body. That’s not terribly useful for most of us here though. We exercise. Sometimes a lot. Like a lot-a-lot for some of us.

To also accommodate the caloric needs estimate for active people, this BMR calculator has a few generalized dropdown selections for activity levels. These go from no, to light, moderate, high, and extreme sports training and workout levels. In general, you could consider it like this:

  • No – you don’t work out
  • Light – 1 to 3 workouts about 30 minutes or less per week
  • Moderate – 3 to 5 workouts about 50 minutes or less per week
  • High – workout pretty much every day for over an hour
  • Extreme – workout every day over 90 minutes regularly > HR Zone 3

Using the BMR Calculator

If you are honest about all of this, and there’s no reason to not be, this BMR calculator will give you your Basal or resting rate of caloric expenditure, as well as an estimated daily caloric need to adequately support your sport, workout, training or other activity level. How do you use this information?

Are you able to track your daily caloric intake, or the calories in the food and drink you consume in a day? There are apps for that, or you can go old-school and use a notebook to track your calories. Take note of the number of calories this BMR Calculator suggests. If you are having difficulty recovering from your workout and you discover that you are not eating as much as you should, you can fix that. If you determine you are eating way too much for your level of activity, then you can also fix that.

Remember to eat good healthy food first. That should be the foundation of your own nutrition plan. If you are wanting to lose weight, or burn fat, some people experience great success by subtracting a few hundred calories from their activity level recommended calories and eating accordingly. Some people can lose a pound or so per week using that method. We’ll talk about that in a later post.


7 Tips for New Ruckers

7 Tips for New Ruckers

If you are curious about how to start rucking, this is for you.

Rucking, often known as “ruck-marching,” is one of the most beneficial and effective physical programs an individual can engage in. Many of us see rucking in different ways. Some see it as a sports related program. Others as military related. But a lot of us see rucking as just a training activity. If you’ve ever been on a long morning or afternoon hike or trek through nature’s beautiful scenery with a backpack filled with supplies, then you’ve been rucking.

On the other hand, backpacking and rucking are totally different. Backpacking is based on adventure, like hiking or mountain climbing. Rucking is intentionally “marching” with a weighted backpack on your back for the sole purpose of training your body physically. A case could as well be made that it involves mental training as well. That’s why many so-called spartan or tough adventure racers love to ruck.

Enjoy Your Seven Rucking Tips

  1. Plan your route

While rucking is quite simply a training program, it sometimes involves going into unknown areas. The first consideration in every journey no matter how short or long, is to make sure that you get back safely. Always endeavor to follow a planned route. Be sure there is someone that knows your intended itinerary should an inopportune emergency arise.

  1. Boot Selection

Always, always, always wear your best boots while rucking. Avoid using inappropriate footwear that does not give adequate support to your ankles and your feet. If in doubt, check with a skilled fitter at your outdoor shop. Explain what you are doing and they’ll help you choose wisely.

  1. Ruck packing

One of the major mistakes most inexperienced ruckers [primarily beginners who are rucking for the first time] make is to fail to pack their bag properly. You’ll know when you’re “knackered” after the first few miles. Always be sure that the heavier weights are packed higher up in the backpack. Make sure they’re fastened securely. Pad them as needed, But also be sure they’re as close to your back as practical. The lower the weight hangs, or the farther away from your spine, the more the effort that is required to counterbalance it. This will in turn cause pain or worse in your lower back and probably your knees as well.

  1. Take longer Strides

If you find yourself slowing down or behind the others, don’t run, take longer strides instead. If you run, you might end up becoming very exhausted too soon. You will also likely bash the weight against your spine while trying to catch up to your intended pace. Running is hardly worth it unless you are already a skilled and experienced trail runner.

  1. Always go along with more than enough hydration

In any training program, there is nothing more essential than water. Always plan to go on rucks with lots of water, electrolyte drinks and maybe even protein shakes if you’ll be out long. Try to consume as much as you need before, during and after the ruck march. Studies have shown an increase in recovery time and reduction in performance with as little as a pint of water lost in sweating that is not replaced.

  1. Take breaks

No matter how much time you spend rucking, you are most likely to break down at some point if you don’t stop and take a break. Taking breaks in between ruck marches can do a great deal of wonder for your recovery and ability to endure long training hikes.

  1. Build Distraction Techniques as Needed

Rucking is as much a mental activity as it is physical. Strive to take your mind off the weights in your backpack while rucking. Don’t focus on them. Avoid the thought of how hard the task is. Be thinking of a cherished friend, or constructing images in your mind that represent your ideal fitness or other goal.

All about rucking

The seven tips for rucking newbies above are primarily for those who will be rucking outside. If you want the full scoop on how to start your own indoor rucking program on a treadmill, be sure to check out my new Rucking Simple Treadmill Training Guide, available on Amazon

Original Treadmill Safety Video

Original Treadmill Safety Video

This treadmill safety video goes back a ways. I mentioned this video in my book, Rucking Simple Treadmill Training Guide. This is a great introductory look at the topic of treadmill safety. This video looks at getting on and off of a treadmill while the belt is moving. Standing safely on the provided non-slip surface of the treadmill deck is your goal. This allows you the freedom to adjust the controls while reducing the risk of a fall off the back of the treadmill.

If you remember, some time ago, a notable government official received a noticeable wound and claimed it was from a treadmill accident. That led me to create this brief video. In the intervening years I’ve modified my sequence here just slightly, but this is still a good video to demonstrate a possibly more safety-conscious approach to mounting and dismounting the treadmill.

Note that in this video I show a technique with the treadmill set at running and walking speeds both. The running speed isn’t that important for our goals with the Rucking Simple programs, so watch if you like, but don’t focus to much on the running demonstration.

In a nutshell, you mount the treadmill while the belt is still. You stand on either side of the belt on the non-slip sticky gritty section meant to be stood upon. You make sure your shoes aren’t touching the belt at all. Then use your controls to bring the belt up to your intended target speed. Be sure to place your hands securely on the rails provided for stability. Wait for the belt to come up to speed. While keeping hold of the rails, step carefully onto the moving belt with your dominant, or intelligent, or perceptive foot. You’ll intuitively know which one that is. Step into a walking motion and bring your other foot out to land in place ahead of your now moving foot and just start walking naturally. When you feel safe and know that you won’t fall off the back of the treadmill, and are at the correct speed, let go of the rails. Be ready to snag them again if you at all unstable.

Why am I so focused on being so careful?

I’ve seen plenty of people fall off the treadmill. I’ve seen them go off the back. I’ve seen them go under the rails. I’ve seen them go under the console. I’ve seen them tip over the rails. I’ve been using a treadmill in commercial facilities and at home for nearly forty years. Believe me, if you just follow these simple steps, stay alert, and be ready to grab onto the rails again while jumping your feet off the belt and out to the sides securely on the deck, you’ll be taking great strides in providing for your own safety on the treadmill.


At the time I was creating this video I was fine tuning the Hikercize Program, which I developed based on my best-selling book Summit Success: Training for Hiking, Mountaineering, and Peak Bagging. This is one of the most complete guides to incline training with a weighted backpack, including stairmasters, stairs, box stepping, and treadmills of inclines from 15 to 40% inclination.


Training on Stairs with a Weighted Backpack

Training on Stairs with a Weighted Backpack

Have you considered training on stairs with a weighted backpack? There are many advantages. If you have access to a good long set of stairs you could easily put on a backpack and climb the stairs for exercise. If you want to increase your training effect, simply add more weight into the backpack. This is a simple variation on rucking, and is easy for many people to do. You could even train on stairs with a weighted backpack in the stairwell at work. If you have several floors of stairs to ascend it is quite a good workout.

I recommend starting with a lower weight load. 5% of your bodyweight should be sufficient for a beginner. Advanced trainees can work their way up to 25% or more or their bodyweight. For a 200 lb trainee that would be 50 lb in the backpack. That is quite a load and it is best to work your way up gently to such a high weight. Safety is a big consideration in training on stairs with a heavy pack. You don’t want to fall and hurt yourself. For long stairways it could be a long fall. Please be very careful not to become injured.


This video illustrates a workout session I did a few years ago while working on my book Summit Success: Training for Hiking, Mountaineering, and Peak Bagging. The paperback is a perennial best seller among all my books on Amazon and has several 5-star ratings. It was the foundation of my recent Rucking Simple Treadmill Training Guide. It just became available on Amazon so check it out and let me know what you think.

Going forward I’m in the process of creating a stairs version of the guide, directed at those using a stepmill or other stair climber cardio machine. That’s a lot of fun and I’ve spent many hours ascending thousands of feet.

If you want to know more about Rucking and Weighted Backpack Training be sure to subscribe to this website so you have updates of every article.